Autumn Braided Hairstyle Tutorials
Although it may still be August, but the fact that we seem to have almost entirely skipped summer this year in the UK and the with turn of seasons already seeming to be in the air, we’re ready to be looking for our hair and makeup inspiration for the autumn months, so I’m going to give this to you in the form of braided hairstyle tutorials!
Whether you’re back from your holidays or perhaps just about to head out to one, thinking ahead for your own work and play hairstyles or staying on top on some simple trends for clients (there’s nothing like a gorgeous but quick and easy hairstyle when you’ve got a crowd of bridesmaids to work on!), these easy autumn braided hairstyle tutorials will give you a running start:

Fishtail Pigtails
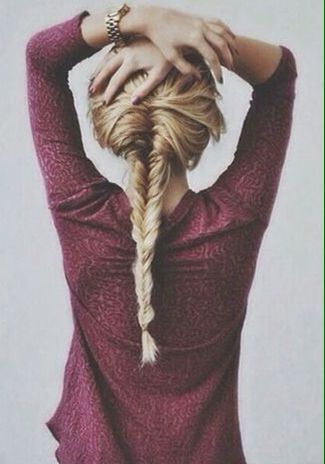
For daily wear, Boho definitely hits it’s peak in Autumn when messy, feminine hairstyles can be matched with wide brimmed hats and suede boots for a totally chic look as the leaves start to brown and a chill appears in the air. Never underestimate the power of perfectly placed fishtail braids, which look fabulous worn wide and a little scruffy in pigtails combined with a flawless outfit.
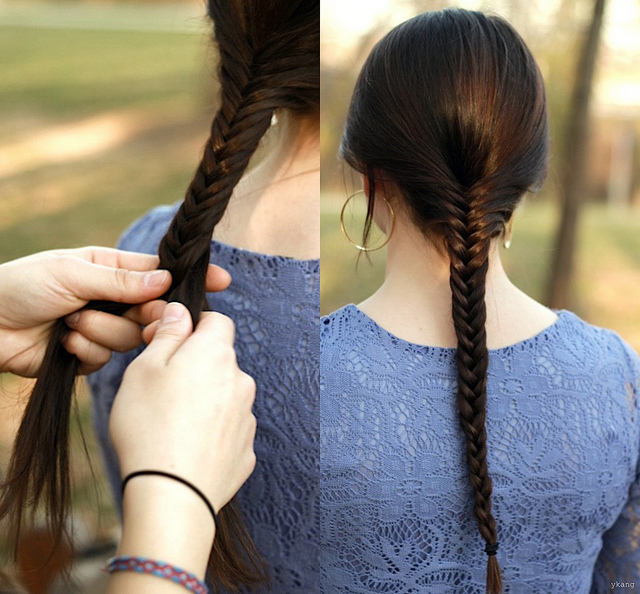
Not sure how to fishtail braid? It may look complicated but it’s super easy and this is one of those braided hairstyle tutorials that is a must-have in any hairstylist’s repertoire, whether you’re an amateur or a pro. As with most braided hairstyle tutorials, you will find fishtail braids easier to handle on day old hair (so, not freshly washed) – this provides some extra grip, slippery soft hair is tricky to work with!
Don’t be intimidated, all it takes is a little extra time. Here’s how:

For pigtails, of course you’ll want to part your hair neatly into two sections first. This works best with a middle parting and two even sections on either side.
- Divide the section you’re working on into two smaller, equal-sized sections and pull out about a half-inch section of hair from the outside of the left section you’ve just created.
- Keeping a firm grip, pull this half inch piece across the top of the left section it came out of, over to the right ponytail taking care not to twist the hair as you go.
- Now do the same come from the right section you have made. Again, taking about a half inch piece from the outside of the right section, pull that over the top of the right and over to the left.
- Repeat this process, alternating sections each time until you reach the bottom of your length of hair. Go as far down as you possibly can and then secure with an elastic
- Follow steps 1-4 all over again on the other side to make your pigtails.
- Once you’re done making your fishtail braids, gently pull at the overlapping sections all the way down the hair to loosen and mess up to your taste. Don’t be nervous here, there’s nothing wrong with it looking quite scruffy, that’s all part of the charm!
Braided Updo
If you’re after something more suitable for ‘occasion wear’ this fall, a beautiful braided up do might be for you.
As seen on Kate Middleton, this elegant hairstyle is easy to create on yourself and others, but no one would ever guess. It just had to go on my list of braided hairstyle tutorials.
- Start by applying a liberal amount of your favourite dry shampoo at the roots to create volume and hold at the roots.
- Next, create your first section to work with by parting your hair at the side. Take a section of hair from here, about 2 inches wide, and do a regular small plait from above the outside of your eyebrow to behind your ear. Repeat on the opposite side.
- Now you should be left with a braid on each side falling down behind your ears and the rest of your hair loose. You’ll want to create some volume now, section out the top/front part of your hair as if you were creating a half up half down hairstyle and backcomb or tease at the crown. When you’re happy with your padding, smooth the surface, twist the hair at the back and secure into place with a grip or pin.
- Moving on to work with the lower half of your hair. Tease all of the hair that is left down for lots of texture and volume – don’t worry if this doesn’t look great right now, it’s an essential part of the process for gorgeous shape and maximum hold. Use LOTS of hairspray!
- Once you’re done teasing all of that hair, carefully roll it up from the ends upwards, ending right where you’ve pinned your top half. Secure well with Smooth the outside and shape until you’re happy.
- Now to bring those braids in that you made earlier! Take hold of the plait from each side, one at a time, at wrap over the top of the big bun you’ve created, crossing over where you have secured the two sections. Pin each braid securely and discreetly underneath the bun.
- Finish this hairstyle by spraying with lots of hairspray again (preferably Elnett Professional – not shop bought, but found in salon wholesalers. This has a strong hold without the wetness and crunchy texture that other hairsprays tend to have) and a glossing spray for an extra shine boost.


